PUBLISHED 15 MARCH 2021
Note: This feature is available for Australia Post customers only.
To send an International shipment you’ll need an Australia Post account with Parcel Send. On Demand and StarTrack accounts cannot send international shipments.
Creating and sending an international shipment with Parcel Send has four main steps. Each step is explained in more detail below.
You can estimate your international shipping costs on the postage calculator.
Summary
- Create a new shipment by clicking + New and choosing International shipment. Fill out the form and save your shipment.
- From the Shipments list, select your shipment and click Print labels.
Printing your labels also moves your shipment to the Ready to despatch tab. - From the Ready to despatch tab, select your shipment and click Despatch. This opens the Despatch summary page.
Check that all your information is correct, then click Manifest & print to print your Manifest summary (called an Order Summary Report). - Book a pickup, or drop off your shipment at the lodgement facility shown on your manifest.
Make sure to include your manifest summary with your shipment.
Step one: Create a shipment
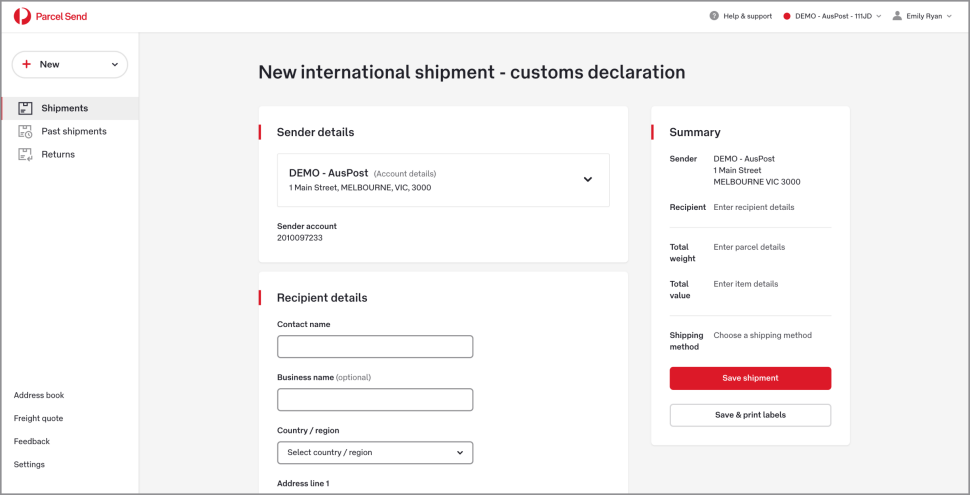
- Create a new shipment by clicking + New and choosing International shipment.
- Check that your Sender details are correct. These are the details linked to your account. If you’ve created alternative business details, use the drop-down menu to select the sender.

3. Enter the recipient details, including at least one contact method for the recipient.
Note: Certain fields aren’t displayed until the destination country is selected, and the fields that are shown vary for different countries.
4. Enter any additional references if available. These details aren’t mandatory, but they may assist with customs clearance in the destination country. Reference details will only be printed on your label if you choose the CN23 label option. If you need to provide a tax number, such as the EU IOSS tax number, enter it in the Importers Reference Number field.
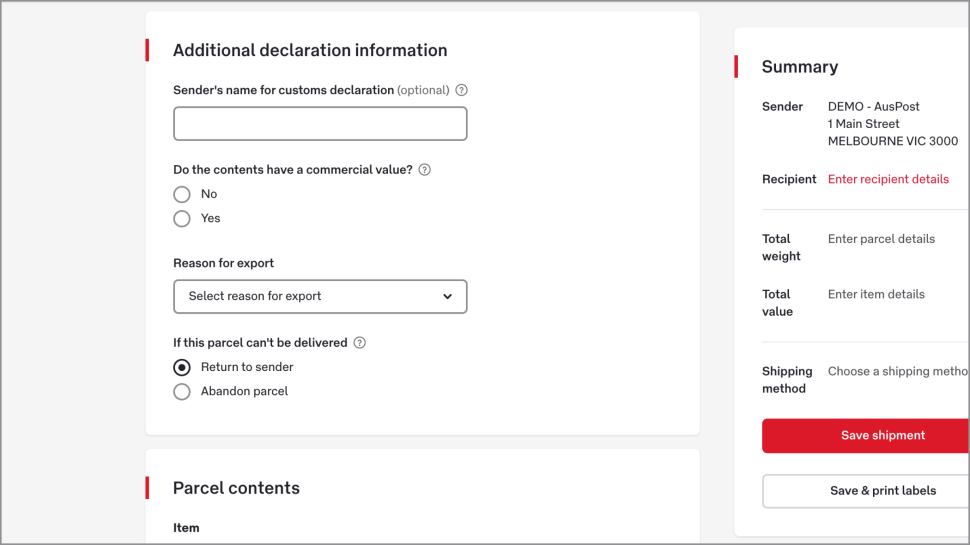
5. Complete the Additional declaration information.
Consider entering the optional Sender’s name for customs declaration. This will print the name on the label, so you won’t have to sign it after printing.

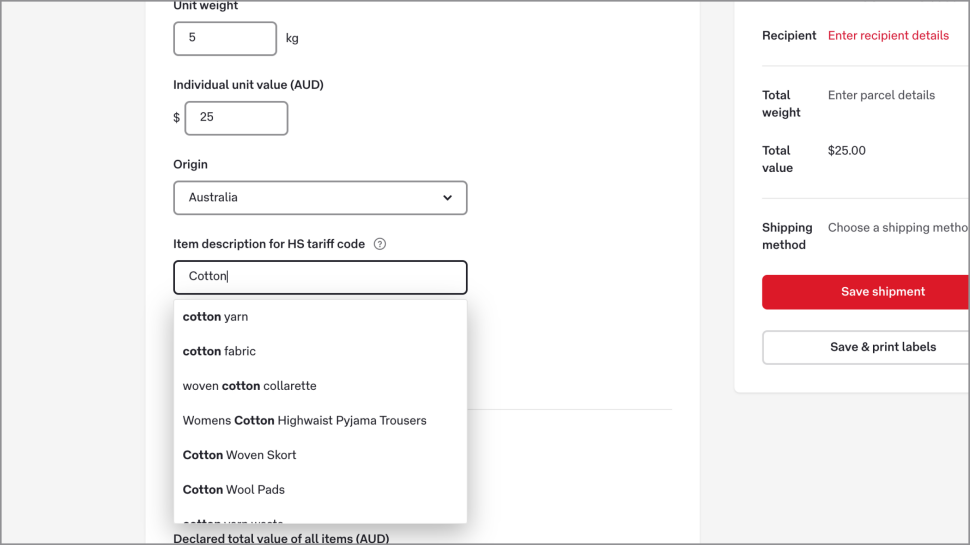
6. Enter the Parcel contents information. Under Item, Quantity is how many items are in the single parcel, and Unit weight is how much each item weighs (e.g., you are posting one parcel containing 2 books, and each book weighs 0.5kg).
Note: International shipments can only contain one parcel each. If you need to send more than one parcel, you’ll need to create a shipment per parcel.
7. Enter an Item description for HS tariff code and choose the closest match from the drop-down list.
To type in a code rather than search, scroll to the bottom of the list and choose Enter HS tariff code manually.
For more information about HS tariff codes, check the current tariff classification information.

8. Complete the Parcel details.
The ‘Parcel’ is the overall package being sent and not the individual items within it. Total weight, parcel dimensions, and the dangerous goods declaration are mandatory. Transit cover value is optional.
9. Choose your international shipping method. Only shipping methods which meet your requirements are shown.
10. Click Save shipment. Your saved shipment will appear on the Shipments page in the Prepare & Print tab.
Tip: If you’re ready to print your labels now, click Save & print labels. Once you print your label, your shipment will appear on the Shipments page in the Ready to Despatch tab.
Step two: Print your labels
Print labels for a single shipment
- On the Shipments page, click the printer icon to the right of the shipment. Your label/s will print, and your shipments will be moved to the Ready to despatch tab.
Print labels for multiple shipments
- Tick the checkbox next to each shipment you want to print labels for.
- Click Print labels. Your labels will print, and your shipments will be moved to the Ready to despatch tab.
Step three: Despatch and print a manifest summary
- On the Shipments page, click the Ready to despatch tab.
- Tick the checkbox next to each shipment, then click Despatch. The Despatch summary screen will appear.
- Check that all the details in your despatch summary are correct, then click Manifest & print to print your Manifest summary (called an Order Summary Report).
Once you print your Manifest summary, your shipment is moved to Past shipments.
To reprint a manifest summary:
- Go to Past shipments to find the relevant shipment. You can use the search bar to find older shipments.
- Click on the manifest ID for your shipment (under Manifest details). The Manifest summary page will open.
- Click Reprint manifest.
Step four: Send your shipment
You’ve told Parcel Send that you’re despatching your shipment, now you’re ready to physically despatch it.
Attach your labels securely to your parcels, and make sure to include your manifest summary with your shipment.
Depending on your contract and your business you can either:
- wait for your regular pickup if you have one
- contact your lodgement facility to arrange an ad-hoc or recurring pickup, or
- drop your shipment off at the lodgement facility shown on your manifest.
Was this helpful?
We read your feedback and use it to improve the help pages for our Parcel Send platform.