PUBLISHED 8 APRIL 2021
Note: This feature is only available for Australia Post and StarTrack customers.
To upload your CSV file and import your shipments
- From the + New drop-down menu in the top left, choose CSV import
- Click Choose file, select your CSV file, then click Open.
- Click Upload and wait while your file is processed.
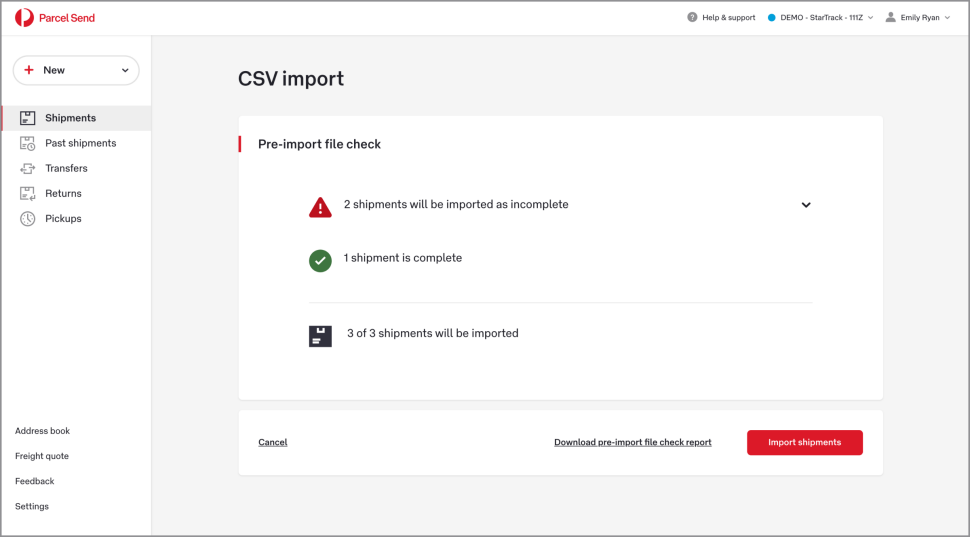
- Review the Pre-import file check. You’ll be able to edit and fix your shipments after you import them, or you can choose to cancel the import and edit your CSV file directly.
You’ll be notified when shipments will be:
- Imported as complete
- Imported as incomplete
(you'll need to complete these after importing them) - Autocorrected
- Imported with errors
(you'll need to correct these after importing them)
Click the arrow to the right of each item to expand the details.
Only the first 20 checks of each type will be shown on your screen – you can view the full list by clicking Download pre-import file check report.

5. Click Import shipments and wait while your shipments are imported.
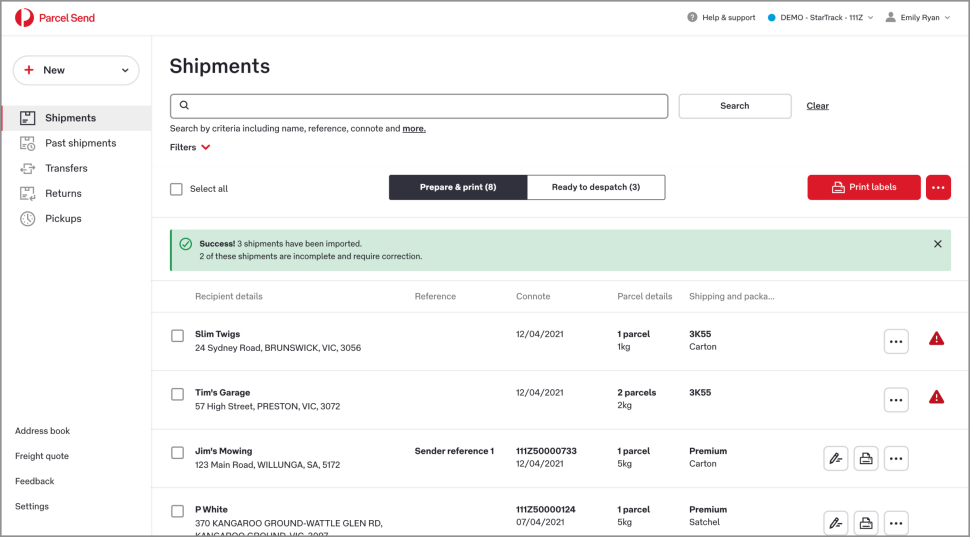
6. Once your shipments have been imported and created you’ll see a success message on the Shipments screen.
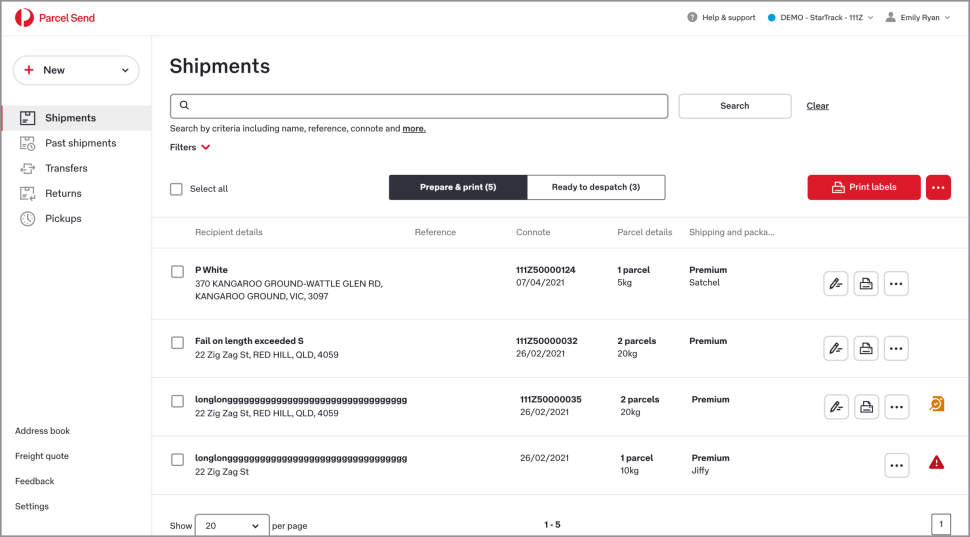
Any shipments that need correction will be marked with a red ‘incomplete’ icon, and any shipments that have been autocorrected will be marked with an orange ‘corrected’ icon. It’s a good idea to check the autocorrected files to make sure their data is correct.

7. If any shipments had errors and weren’t imported, correct these in your CSV file and remove any shipments that were already imported. If you don’t remove the shipments that were already imported they’ll be imported again, creating duplicates.
Repeat steps 1–6 to import your remaining shipments.
Incomplete and autocorrected shipments
When certain data is missing from your CSV file you’ll still be able to import your incomplete shipments, but you’ll need to complete them before you can print your labels. They’ll be marked with a red triangle symbol with an exclamation mark.
Open the shipment and fill in any incomplete fields, then save the shipment.
You can print labels for autocorrected shipments without editing them, but it’s always a good idea to double check them to make sure their data has been updated correctly.

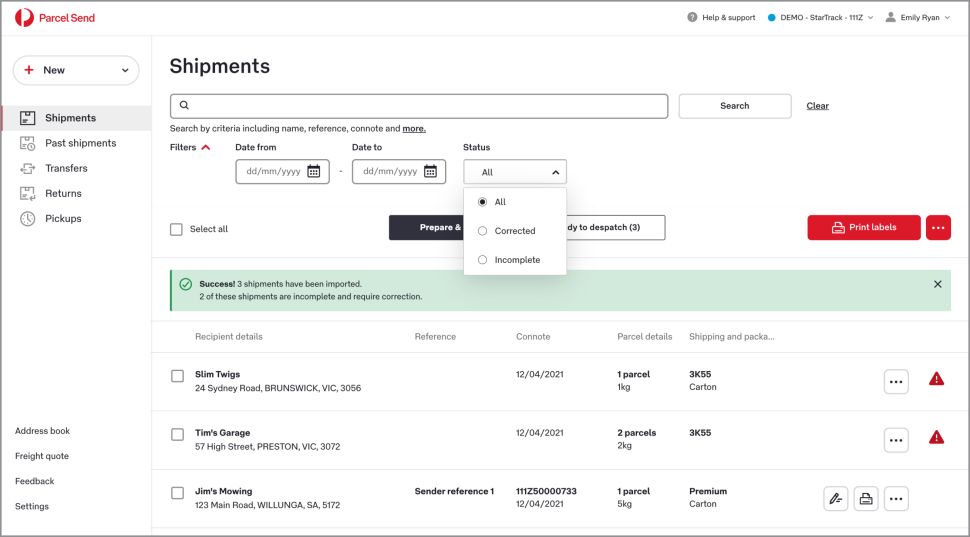
You can also filter shipments by status, making it easier to find and update incomplete or autocorrected shipments.

Was this helpful?
We read your feedback and use it to improve the help pages for our Parcel Send platform.