PUBLISHED 31 MARCH 2021
If you’ve migrated from an older platform, like My StarTrack or Despatcher, you may need to configure your printer before you can print labels using Parcel Send.
The following steps are based on a Windows 10 device and a Zebra thermal printer. However, the label dimensions should work for most other printers. Please speak to your IT department for help with printer settings and to install new software.
Install the printer and up-to-date drivers
If you haven’t already, make sure your printer is installed and you have the latest drivers. You should be able to find these from your printer manufacturer’s website. For example, the Zebra website has downloadable drivers for many of their printers.
Configure your printer settings
Once your printer is installed, make sure it’s configured correctly:
- Open the Windows Control Panel.
- Go to View devices and printers.
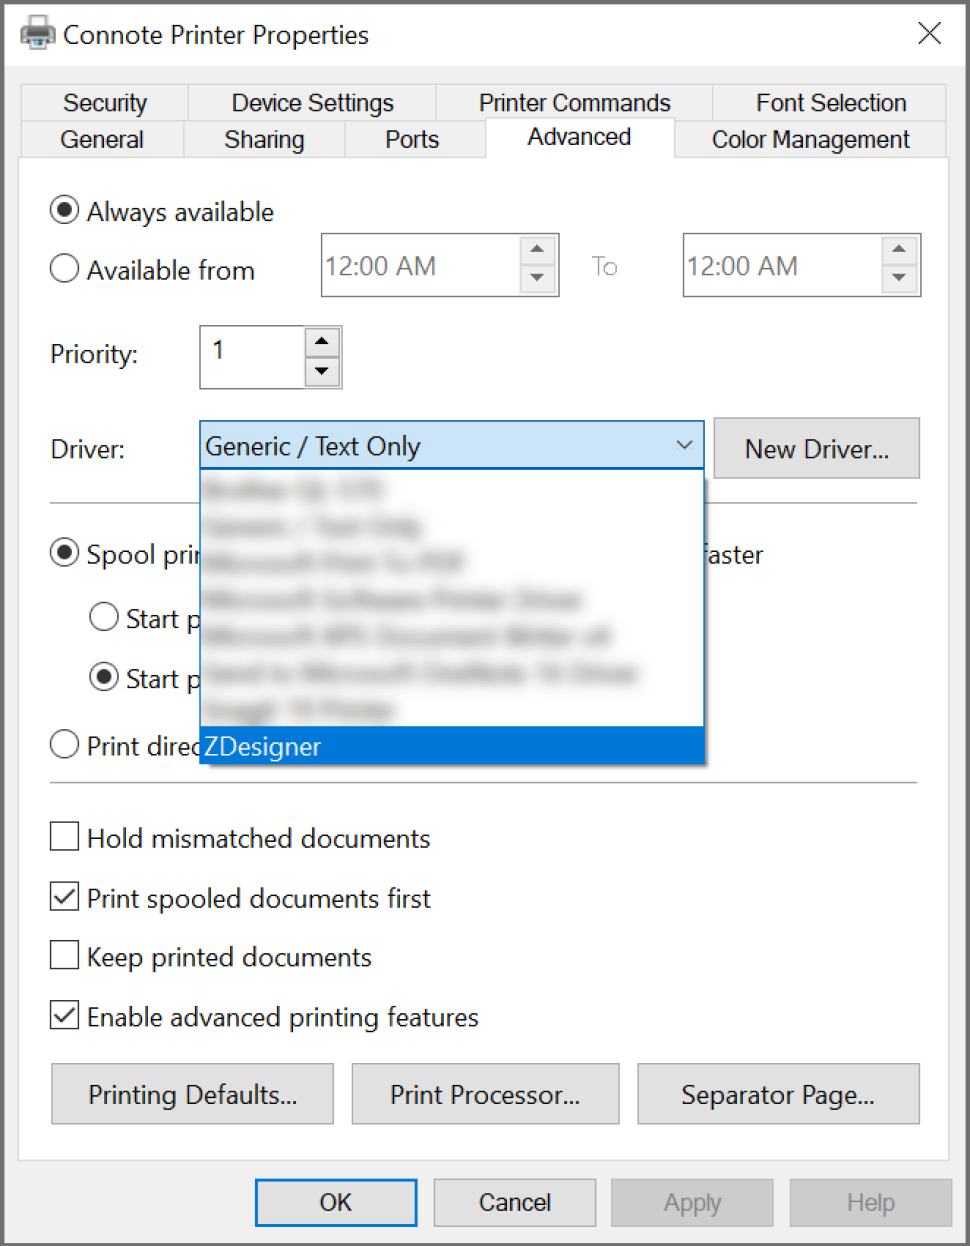
- Right-click on the printer you want to use and select Printer properties. On the window that opens, choose the Advanced tab.
- In the Driver drop-down menu, choose ZDesigner. It may appear as ZDesigner plus the model number of your printer.
- Click OK to save your settings.

Set the label size dimensions on the printer
Once your printer is configured, set the correct label size dimensions on the printer settings:
- From the View devices and printers menu, right-click again on your printer. Then select Printing preferences.
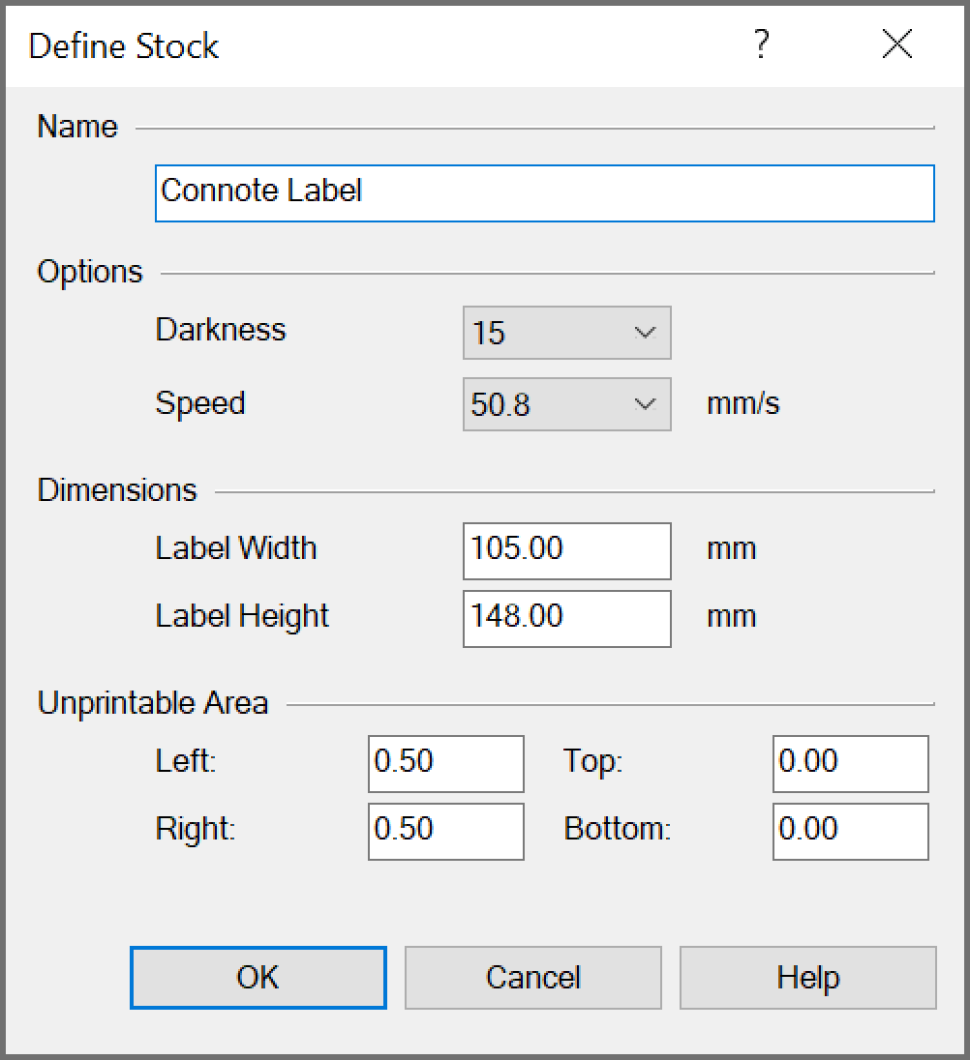
- Open the Stocks tab and click the New button. The Define Stock menu should appear.
- Enter the following information to the fields then click OK:
Name: Connote Label
Darkness: 15
Speed: 5 (cm/s)
Label Width: 10.50 (cm)
Label Height: 14.80 (cm)
Unprintable Area (cm)
Left: 0.05
Top: 0.00
Right: 0.05
Bottom: 0.00 - Click Apply then select the Options tab.
- Under the Stocks drop-down menu, choose ‘Connote Label’. This is the settings you added in Step 3. If you named your stock something else, choose that from the list.
- Click OK. Then, from the Printer properties screen, click OK again.

Set your Parcel Send label printing preferences
Finally, set your Parcel Send label printing preference to A6 - 1 label.
Was this helpful?
We read your feedback and use it to improve the help pages for our Parcel Send platform.